
Blog Painting, LLC
- Free Estimates
- We Price Match
- 20+ Years of Experience
Hours: Open • Closes 5:00 pm
Blogs
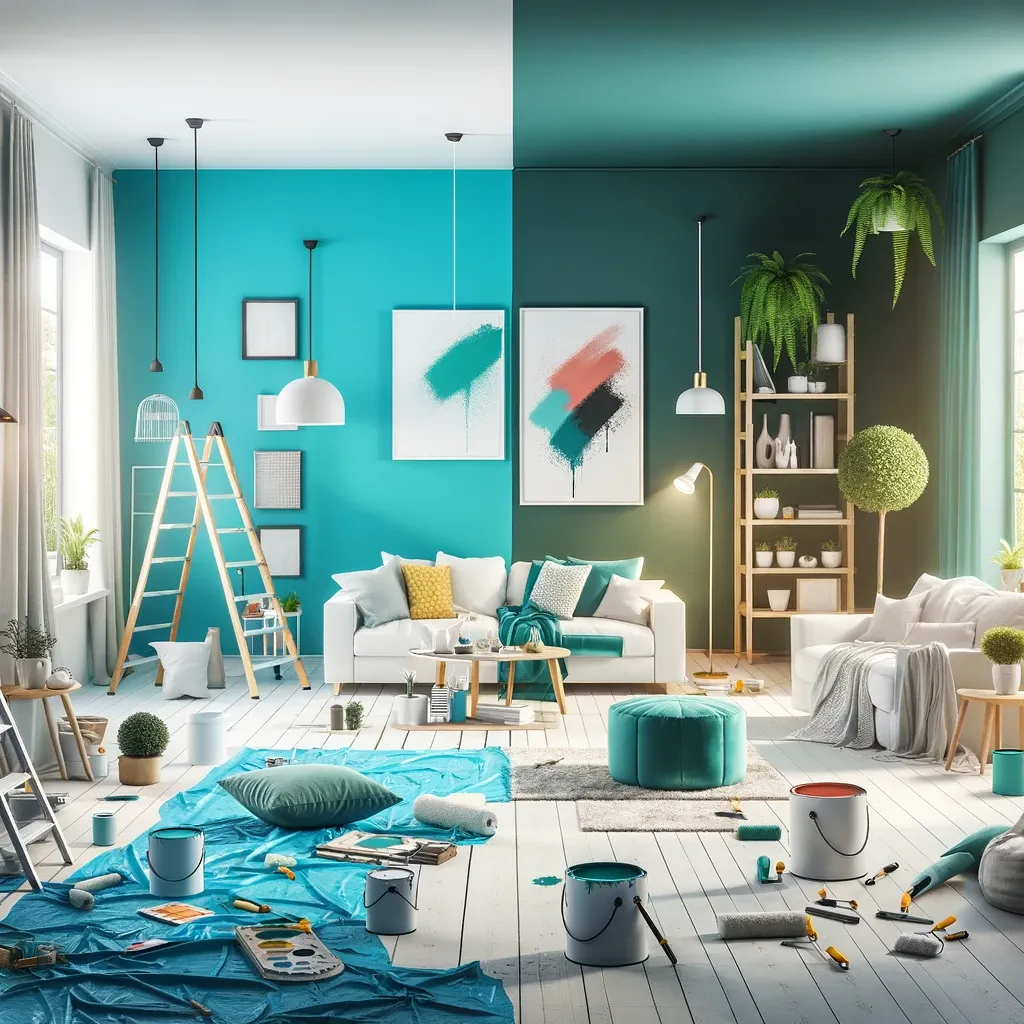
Painting Renovation: How to Transform Your Space
Revitalize Your Home With Our Painting Renovation Guide:

You've been staring at the same four walls for years now, and you're ready for a change. Those once bright and cheerful paint colors have faded into a dull and dreary backdrop for your life. It's time for a transformation - a fresh coat of paint can revive your space and your spirits. You're craving color and life injected back into your home. The good news is a DIY painting renovation project is an easy, affordable way to create a dramatic new look without a huge investment of time or money. With some planning and the right techniques, you'll be enjoying your newly refreshing space in no time. This guide will walk you through the steps to turn your painting vision into a reality. By the end of this, your walls will be ready for their close-up. A new you and a new, colorful space - what could be better? Let's get started!
Preparing for Your Painting Renovation

Preparing for any home renovation project requires time and planning. A painting renovation is no different. To transform your space with a fresh coat of paint, you'll need to do some prep work first.
Clean and Repair
Give the room a deep clean before painting. Wipe down walls and trim to remove any dirt or grease. Clean windows and sills. Fill any cracks
Protect Floors and Furniture
Holes in the walls with spackle or wall filler and sand smooth. Make any necessary repairs to walls, ceilings, or trim. Cleaning and fixing any imperfections will ensure you have a smooth surface for painting and the best results.
Place drop cloths, tarpaulins, or plastic sheeting over floors, carpets, and furniture to shield them from drips and splatters. Use painter's tape to protect edges and trim. Remove the outlet and switch covers and tape over the openings. Consider moving furniture out of the room altogether if possible. The time spent protecting your space will be well worth it for easy cleanup after painting.
Primer (optional)
For the best coverage, consider applying a primer. Primer helps the new paint adhere better to the walls. It's especially useful when painting over dark colors or patching repairs. Apply a coat of primer and let it dry as directed before painting.
Paint Selection
Choose a paint formulated for the room you're painting, like bathroom, kitchen, or trim paint. For most rooms, an eggshell or satin sheen works well. Buy sample sizes to test colors before committing to a full gallon. Get all your painting supplies, like brushes, rollers, trays, and extension handles.
With the proper preparation done, you're ready to start your painting renovation. Take your time the key to a successful DIY paint job is applying thin, even coats and letting each coat dry completely between applications. Follow the tips above, and soon, you'll have a newly transformed space to enjoy!
Choosing Paint Colors and Finishes

Choosing the right paint colors and finishes for your space can make a huge impact. The options seem endless, so how do you decide? Start by considering the overall mood you want to create. Bright, warm colors like reds and yellows evoke energy and cheerfulness. Cool blues and grays are more calming and serene. Neutral beiges and tans help brighten a space in a subtle way.
Once you have a general color scheme in mind, determine if you want a matte, eggshell, satin or high-gloss finish. Matte and eggshell paints have a flat, velvety look that hides imperfections well. Satin and glossy paints make a statement with a shiny, reflective finish that magnifies the color. Satin works nicely for trim, while glossy paint can modernize kitchens and bathrooms.
For the walls in living rooms, bedrooms, and home offices, neutral and medium-tone matte or eggshell paints are versatile and forgiving. In high-traffic areas like hallways, staircases, and kids' rooms, satin or glossy paint stands up well to scratches and stains. Consider durable enamel paint for trim, doors, and cabinets.
Don't forget the ceiling! Painting the ceiling a lighter shade of your wall color helps open up and brighten the space. An accent wall in a complementary shade or contrasting color provides visual depth and interest. Once you've narrowed down your options, buy sample pots to view the colors in your actual space. Colors change dramatically depending on lighting and surroundings.
When painting, use a high-quality angled brush for cutting in edges and a roller for large, open areas. Apply at least two coats of paint, waiting 2-4 hours between coats. Start at the top and work your way down using smooth, even strokes. For the best results, take your time a good paint job can last for many years and transform the look and feel of your home.
Hiring Professional Painters vs DIY Painting

When it comes to home renovations, painting is one of the easiest ways to transform a space. But should you hire professional painters or take on the project yourself? There are pros and cons to both options.
DIY Painting
Painting your own place has some benefits. You'll save money by not paying for labor. You can work at your own pace and on your own schedule. And for small projects, DIY painting is certainly doable if you're at least somewhat handy. However, for larger jobs or if you have limited experience, professional help is probably worthwhile.
Some downsides to DIY painting:
It can be time-consuming and tiring, especially for big rooms or multi-room projects.
You have to buy or rent equipment like rollers, brushes, trays, ladders, etc.
There's a learning curve to get good results. Uneven coats, drips, and brush marks are common mistakes.
Prep work like patching holes, cleaning walls, and taping trim is tedious and important to get right.
You're solely responsible if anything goes wrong or the end result isn't up to your standards.
Hiring Professional Painters
Bringing in the pros has significant advantages. They have the proper experience, tools, and skills to handle the entire project efficiently with quality results.
Professionals can complete the work much faster. They know all the necessary steps and best techniques.
They provide a warranty or guarantee in case you're not satisfied with the final product.
Liability insurance and workers comp coverage gives you peace of mind.
An experienced painter can offer advice on colors and finishes and address any issues that come up.
The main downside is the cost. Paying pros typically costs significantly more than a DIY job. Get at least three estimates to compare.
For the best results at a lower cost, you could do the prep work yourself and hire painters just for the actual painting. In the end, evaluate how much time and energy you want to put in versus your budget to determine if DIY or professional help is the better choice for your painting renovation.
Painting Techniques for a Flawless Finish

When tackling a painting renovation, using the proper techniques will ensure you get professional-looking results. The key is taking your time and paying attention to the details.
First, make sure the walls are properly prepped. Patch any holes or cracks, then sand rough areas. Wipe away dust with a tack cloth. Apply a primer if you're going from a dark color to a light color. Let the primer dry as directed.
Use painter's tape to protect trim, ceilings, and floors. Carefully tape off any outlets or switches as well. Remove tape as you go to avoid having to scrape dried paint off the tape.
Use a paintbrush to "cut in" around the edges and trim before rolling. Load the brush with paint and use short strokes, reloading as needed. An angled brush works well for corners.
For rolling, use a roller cover recommended for your paint type. Load the roller with paint and roll it over the wall using vertical strokes. Refill as needed, making sure not to overload the roller. Work sections across the wall.
Consider using an extension pole for high ceilings or hard-to-reach areas. Attach the roller to the pole and slowly roll across the surface, applying firm and even pressure. Have someone spot you from below to ensure even coverage.
Inspect your work and touch up as needed. Look for any drips, uneven coverage, or missed spots and fix them. For the best results, consider applying two coats of paint waiting for each coat to dry completely between applications.
With some patience and the proper technique, you'll achieve a smooth and professional finish. Take a step back and admire your handiwork - you've successfully transformed your space with a fresh coat of paint!
Caring for Your Freshly Painted Space

Now that you have a freshly painted space, it's important to care for it to keep it looking its best properly. Follow these tips to maintain your new paint job:
Ventilate and Dry
Keep windows open to ventilate and circulate the air in the room. This will help eliminate the paint smell and any volatile organic compounds (VOCs) released from the new paint. Run an exhaust fan to improve ventilation if possible.
Make sure the paint has dried completely before closing windows or using the space. Most latex paints dry to the touch within 1-2 hours but need at least 24-48 hours to cure before closing up a room. Oil-based paints require even longer.
Avoid excess moisture in the room for several days. Don't take long, steamy showers, do laundry or cook foods that produce grease or steam. Moisture can damage the new paint before it has fully cured.
Gently Clean
For the first week, only do light dusting and vacuuming in the space. Avoid harsh chemicals, abrasive cleaners, and rough scrubbing.
After 1-2 weeks, you can resume normal cleaning in the room using a soft rag or microfiber cloth and gentle, pH-neutral cleaners. Avoid scrubbing at scuffs or stains during this time.
For stuck-on messes, try a non-toxic product like diluted white vinegar, baking soda paste, or citrus solvent and gently blot until clean.
Touch Up As Needed
Examine the new paint for any drips, splatters or missed spots and touch up with a small artist's brush as needed. For larger flaws, you may need to do minor touch-ups with a roller.
Match the paint color precisely to avoid obvious patches. Save any leftover paint in case you need it for future touch-ups due to nicks, stains, or water damage.
By following these helpful hints, you'll keep your new paint looking fresh for years to come. Take it slow, be gentle, ventilate well, and touch up any imperfections. Your newly renovated space will stay picture-perfect.
Wrapping Up Your DIY Painting Adventure
You've got the basics down now, so it's time to get to work. Grab your paintbrush, roll up your sleeves, and get ready for a weekend of home improvement. By taking the time to prepare the space properly, choose colors you love, and apply 2-3 coats for the best coverage, you'll have a fresh new look in no time. Once the final coat is dry and you step back to admire your handiwork, you'll be glad you took on this project. Your newly painted room will make you smile every time you walk in, and you can proudly say you did it yourself. The transformation is complete! Enjoy your freshly painted space - you've earned it. Until next time, keep on making your house a home.
Frequently Asked Questions
How do I choose the right paint finish for different rooms in my home?
Choosing the right paint finish is crucial for both aesthetics and durability. For high-traffic areas or rooms exposed to moisture, like kitchens and bathrooms typical in Rhode Island homes, a semi-gloss or high-gloss finish is ideal due to its moisture resistance and ease of cleaning. Living rooms and bedrooms, on the other hand, benefit from an eggshell or satin finish, providing a subtle glow that enhances the natural light reminiscent of the coastal ambiance of Rhode Island. The finish not only complements the room's function but also accentuates its design.
Can paint colors affect the mood and atmosphere of my home?
Absolutely! Paint colors have a significant impact on a room's mood. For example, cool blues and greens, inspired by Rhode Island’s coastal landscapes, can create a serene and calming atmosphere, perfect for bedrooms or studies. Warmer tones, like yellows or soft oranges, can evoke cheerfulness and warmth, making them great choices for kitchens or living areas. When choosing colors, consider the emotional impact and how it aligns with the purpose of each room, infusing a bit of Rhode Island's tranquil yet vibrant essence into your space.
What are the best practices for ensuring a flawless paint job?
A flawless paint job starts with thorough preparation. Ensure the walls are clean, dry, and smooth. Repair any cracks or holes and sand down uneven surfaces. Using painter's tape for clean edges and applying a primer can enhance paint adhesion, which is especially important in the varied climates of Rhode Island. When painting, use long, even strokes and avoid overloading the brush or roller to prevent drips. Letting each coat dry thoroughly before applying the next is crucial for a smooth, even finish that captures the beauty and resilience of Rhode Island homes.
Are there specific color trends for painting in coastal areas like Rhode Island?
In coastal areas like Rhode Island, color trends often draw inspiration from the natural surroundings. Think of the soft blues, greens, and sandy neutrals that mimic the ocean, beaches, and coastal flora. These colors create a serene, open atmosphere, reflecting the state's natural beauty. Incorporating these colors into your home can bring a sense of calm and continuity with the environment, perfectly aligning with Rhode Island’s scenic landscapes and historic charm.
When should I consider hiring professional painters instead of DIY?
Consider hiring professional painters for large-scale projects, intricate work, or if you’re unsure about tackling the project yourself. Professionals bring expertise in surface preparation, color selection, and application techniques, ensuring a high-quality finish. This is particularly beneficial for historic Rhode Island homes, where preserving architectural integrity is key. While DIY can be satisfying, professional painters save time and guarantee a polished result, especially in complex spaces or when using advanced techniques that reflect the distinct character of Rhode Island homes.

Commercial Interior Painting
Painting Renovation: How to Transform Your Space
Revitalize Your Home With Our Painting Renovation Guide:
You've been staring at the same four walls for years now, and you're ready for a change. Those once bright and cheerful paint colors have faded into a dull and dreary backdrop for your life. It's time for a transformation - a fresh coat of paint can revive your space and your spirits. You're craving color and life injected back into your home. The good news is a DIY painting renovation project is an easy, affordable way to create a dramatic new look without a huge investment of time or money. With some planning and the right techniques, you'll be enjoying your newly refreshing space in no time. This guide will walk you through the steps to turn your painting vision into a reality. By the end of this, your walls will be ready for their close-up. A new you and a new, colorful space - what could be better? Let's get started!
Preparing for Your Painting Renovation
Preparing for any home renovation project requires time and planning. A painting renovation is no different. To transform your space with a fresh coat of paint, you'll need to do some prep work first.
Clean and Repair
Give the room a deep clean before painting. Wipe down walls and trim to remove any dirt or grease. Clean windows and sills. Fill any cracks
Protect Floors and Furniture
Holes in the walls with spackle or wall filler and sand smooth. Make any necessary repairs to walls, ceilings, or trim. Cleaning and fixing any imperfections will ensure you have a smooth surface for painting and the best results.
Place drop cloths, tarpaulins, or plastic sheeting over floors, carpets, and furniture to shield them from drips and splatters. Use painter's tape to protect edges and trim. Remove the outlet and switch covers and tape over the openings. Consider moving furniture out of the room altogether if possible. The time spent protecting your space will be well worth it for easy cleanup after painting.
Primer (optional)
For the best coverage, consider applying a primer. Primer helps the new paint adhere better to the walls. It's especially useful when painting over dark colors or patching repairs. Apply a coat of primer and let it dry as directed before painting.
Paint Selection
Choose a paint formulated for the room you're painting, like bathroom, kitchen, or trim paint. For most rooms, an eggshell or satin sheen works well. Buy sample sizes to test colors before committing to a full gallon. Get all your painting supplies, like brushes, rollers, trays, and extension handles.
With the proper preparation done, you're ready to start your painting renovation. Take your time the key to a successful DIY paint job is applying thin, even coats and letting each coat dry completely between applications. Follow the tips above, and soon, you'll have a newly transformed space to enjoy!
Choosing Paint Colors and Finishes
Choosing the right paint colors and finishes for your space can make a huge impact. The options seem endless, so how do you decide? Start by considering the overall mood you want to create. Bright, warm colors like reds and yellows evoke energy and cheerfulness. Cool blues and grays are more calming and serene. Neutral beiges and tans help brighten a space in a subtle way.
Once you have a general color scheme in mind, determine if you want a matte, eggshell, satin or high-gloss finish. Matte and eggshell paints have a flat, velvety look that hides imperfections well. Satin and glossy paints make a statement with a shiny, reflective finish that magnifies the color. Satin works nicely for trim, while glossy paint can modernize kitchens and bathrooms.
For the walls in living rooms, bedrooms, and home offices, neutral and medium-tone matte or eggshell paints are versatile and forgiving. In high-traffic areas like hallways, staircases, and kids' rooms, satin or glossy paint stands up well to scratches and stains. Consider durable enamel paint for trim, doors, and cabinets.
Don't forget the ceiling! Painting the ceiling a lighter shade of your wall color helps open up and brighten the space. An accent wall in a complementary shade or contrasting color provides visual depth and interest. Once you've narrowed down your options, buy sample pots to view the colors in your actual space. Colors change dramatically depending on lighting and surroundings.
When painting, use a high-quality angled brush for cutting in edges and a roller for large, open areas. Apply at least two coats of paint, waiting 2-4 hours between coats. Start at the top and work your way down using smooth, even strokes. For the best results, take your time a good paint job can last for many years and transform the look and feel of your home.
Hiring Professional Painters vs DIY Painting
When it comes to home renovations, painting is one of the easiest ways to transform a space. But should you hire professional painters or take on the project yourself? There are pros and cons to both options.
DIY Painting
Painting your own place has some benefits. You'll save money by not paying for labor. You can work at your own pace and on your own schedule. And for small projects, DIY painting is certainly doable if you're at least somewhat handy. However, for larger jobs or if you have limited experience, professional help is probably worthwhile.
Some downsides to DIY painting:
It can be time-consuming and tiring, especially for big rooms or multi-room projects.
You have to buy or rent equipment like rollers, brushes, trays, ladders, etc.
There's a learning curve to get good results. Uneven coats, drips, and brush marks are common mistakes.
Prep work like patching holes, cleaning walls, and taping trim is tedious and important to get right.
You're solely responsible if anything goes wrong or the end result isn't up to your standards.
Hiring Professional Painters
Bringing in the pros has significant advantages. They have the proper experience, tools, and skills to handle the entire project efficiently with quality results.
Professionals can complete the work much faster. They know all the necessary steps and best techniques.
They provide a warranty or guarantee in case you're not satisfied with the final product.
Liability insurance and workers comp coverage gives you peace of mind.
An experienced painter can offer advice on colors and finishes and address any issues that come up.
The main downside is the cost. Paying pros typically costs significantly more than a DIY job. Get at least three estimates to compare.
For the best results at a lower cost, you could do the prep work yourself and hire painters just for the actual painting. In the end, evaluate how much time and energy you want to put in versus your budget to determine if DIY or professional help is the better choice for your painting renovation.
Painting Techniques for a Flawless Finish
When tackling a painting renovation, using the proper techniques will ensure you get professional-looking results. The key is taking your time and paying attention to the details.
First, make sure the walls are properly prepped. Patch any holes or cracks, then sand rough areas. Wipe away dust with a tack cloth. Apply a primer if you're going from a dark color to a light color. Let the primer dry as directed.
Use painter's tape to protect trim, ceilings, and floors. Carefully tape off any outlets or switches as well. Remove tape as you go to avoid having to scrape dried paint off the tape.
Use a paintbrush to "cut in" around the edges and trim before rolling. Load the brush with paint and use short strokes, reloading as needed. An angled brush works well for corners.
For rolling, use a roller cover recommended for your paint type. Load the roller with paint and roll it over the wall using vertical strokes. Refill as needed, making sure not to overload the roller. Work sections across the wall.
Consider using an extension pole for high ceilings or hard-to-reach areas. Attach the roller to the pole and slowly roll across the surface, applying firm and even pressure. Have someone spot you from below to ensure even coverage.
Inspect your work and touch up as needed. Look for any drips, uneven coverage, or missed spots and fix them. For the best results, consider applying two coats of paint waiting for each coat to dry completely between applications.
With some patience and the proper technique, you'll achieve a smooth and professional finish. Take a step back and admire your handiwork - you've successfully transformed your space with a fresh coat of paint!
Caring for Your Freshly Painted Space
Now that you have a freshly painted space, it's important to care for it to keep it looking its best properly. Follow these tips to maintain your new paint job:
Ventilate and Dry
Keep windows open to ventilate and circulate the air in the room. This will help eliminate the paint smell and any volatile organic compounds (VOCs) released from the new paint. Run an exhaust fan to improve ventilation if possible.
Make sure the paint has dried completely before closing windows or using the space. Most latex paints dry to the touch within 1-2 hours but need at least 24-48 hours to cure before closing up a room. Oil-based paints require even longer.
Avoid excess moisture in the room for several days. Don't take long, steamy showers, do laundry or cook foods that produce grease or steam. Moisture can damage the new paint before it has fully cured.
Gently Clean
For the first week, only do light dusting and vacuuming in the space. Avoid harsh chemicals, abrasive cleaners, and rough scrubbing.
After 1-2 weeks, you can resume normal cleaning in the room using a soft rag or microfiber cloth and gentle, pH-neutral cleaners. Avoid scrubbing at scuffs or stains during this time.
For stuck-on messes, try a non-toxic product like diluted white vinegar, baking soda paste, or citrus solvent and gently blot until clean.
Touch Up As Needed
Examine the new paint for any drips, splatters or missed spots and touch up with a small artist's brush as needed. For larger flaws, you may need to do minor touch-ups with a roller.
Match the paint color precisely to avoid obvious patches. Save any leftover paint in case you need it for future touch-ups due to nicks, stains, or water damage.
By following these helpful hints, you'll keep your new paint looking fresh for years to come. Take it slow, be gentle, ventilate well, and touch up any imperfections. Your newly renovated space will stay picture-perfect.
Wrapping Up Your DIY Painting Adventure
You've got the basics down now, so it's time to get to work. Grab your paintbrush, roll up your sleeves, and get ready for a weekend of home improvement. By taking the time to prepare the space properly, choose colors you love, and apply 2-3 coats for the best coverage, you'll have a fresh new look in no time. Once the final coat is dry and you step back to admire your handiwork, you'll be glad you took on this project. Your newly painted room will make you smile every time you walk in, and you can proudly say you did it yourself. The transformation is complete! Enjoy your freshly painted space - you've earned it. Until next time, keep on making your house a home.
Frequently Asked Questions
How do I choose the right paint finish for different rooms in my home?
Choosing the right paint finish is crucial for both aesthetics and durability. For high-traffic areas or rooms exposed to moisture, like kitchens and bathrooms typical in Rhode Island homes, a semi-gloss or high-gloss finish is ideal due to its moisture resistance and ease of cleaning. Living rooms and bedrooms, on the other hand, benefit from an eggshell or satin finish, providing a subtle glow that enhances the natural light reminiscent of the coastal ambiance of Rhode Island. The finish not only complements the room's function but also accentuates its design.
Can paint colors affect the mood and atmosphere of my home?
Absolutely! Paint colors have a significant impact on a room's mood. For example, cool blues and greens, inspired by Rhode Island’s coastal landscapes, can create a serene and calming atmosphere, perfect for bedrooms or studies. Warmer tones, like yellows or soft oranges, can evoke cheerfulness and warmth, making them great choices for kitchens or living areas. When choosing colors, consider the emotional impact and how it aligns with the purpose of each room, infusing a bit of Rhode Island's tranquil yet vibrant essence into your space.
What are the best practices for ensuring a flawless paint job?
A flawless paint job starts with thorough preparation. Ensure the walls are clean, dry, and smooth. Repair any cracks or holes and sand down uneven surfaces. Using painter's tape for clean edges and applying a primer can enhance paint adhesion, which is especially important in the varied climates of Rhode Island. When painting, use long, even strokes and avoid overloading the brush or roller to prevent drips. Letting each coat dry thoroughly before applying the next is crucial for a smooth, even finish that captures the beauty and resilience of Rhode Island homes.
Are there specific color trends for painting in coastal areas like Rhode Island?
In coastal areas like Rhode Island, color trends often draw inspiration from the natural surroundings. Think of the soft blues, greens, and sandy neutrals that mimic the ocean, beaches, and coastal flora. These colors create a serene, open atmosphere, reflecting the state's natural beauty. Incorporating these colors into your home can bring a sense of calm and continuity with the environment, perfectly aligning with Rhode Island’s scenic landscapes and historic charm.
When should I consider hiring professional painters instead of DIY?
Consider hiring professional painters for large-scale projects, intricate work, or if you’re unsure about tackling the project yourself. Professionals bring expertise in surface preparation, color selection, and application techniques, ensuring a high-quality finish. This is particularly beneficial for historic Rhode Island homes, where preserving architectural integrity is key. While DIY can be satisfying, professional painters save time and guarantee a polished result, especially in complex spaces or when using advanced techniques that reflect the distinct character of Rhode Island homes.
Interior Painting
Painting Renovation: How to Transform Your Space
Revitalize Your Home With Our Painting Renovation Guide:
You've been staring at the same four walls for years now, and you're ready for a change. Those once bright and cheerful paint colors have faded into a dull and dreary backdrop for your life. It's time for a transformation - a fresh coat of paint can revive your space and your spirits. You're craving color and life injected back into your home. The good news is a DIY painting renovation project is an easy, affordable way to create a dramatic new look without a huge investment of time or money. With some planning and the right techniques, you'll be enjoying your newly refreshing space in no time. This guide will walk you through the steps to turn your painting vision into a reality. By the end of this, your walls will be ready for their close-up. A new you and a new, colorful space - what could be better? Let's get started!
Preparing for Your Painting Renovation
Preparing for any home renovation project requires time and planning. A painting renovation is no different. To transform your space with a fresh coat of paint, you'll need to do some prep work first.
Clean and Repair
Give the room a deep clean before painting. Wipe down walls and trim to remove any dirt or grease. Clean windows and sills. Fill any cracks
Protect Floors and Furniture
Holes in the walls with spackle or wall filler and sand smooth. Make any necessary repairs to walls, ceilings, or trim. Cleaning and fixing any imperfections will ensure you have a smooth surface for painting and the best results.
Place drop cloths, tarpaulins, or plastic sheeting over floors, carpets, and furniture to shield them from drips and splatters. Use painter's tape to protect edges and trim. Remove the outlet and switch covers and tape over the openings. Consider moving furniture out of the room altogether if possible. The time spent protecting your space will be well worth it for easy cleanup after painting.
Primer (optional)
For the best coverage, consider applying a primer. Primer helps the new paint adhere better to the walls. It's especially useful when painting over dark colors or patching repairs. Apply a coat of primer and let it dry as directed before painting.
Paint Selection
Choose a paint formulated for the room you're painting, like bathroom, kitchen, or trim paint. For most rooms, an eggshell or satin sheen works well. Buy sample sizes to test colors before committing to a full gallon. Get all your painting supplies, like brushes, rollers, trays, and extension handles.
With the proper preparation done, you're ready to start your painting renovation. Take your time the key to a successful DIY paint job is applying thin, even coats and letting each coat dry completely between applications. Follow the tips above, and soon, you'll have a newly transformed space to enjoy!
Choosing Paint Colors and Finishes
Choosing the right paint colors and finishes for your space can make a huge impact. The options seem endless, so how do you decide? Start by considering the overall mood you want to create. Bright, warm colors like reds and yellows evoke energy and cheerfulness. Cool blues and grays are more calming and serene. Neutral beiges and tans help brighten a space in a subtle way.
Once you have a general color scheme in mind, determine if you want a matte, eggshell, satin or high-gloss finish. Matte and eggshell paints have a flat, velvety look that hides imperfections well. Satin and glossy paints make a statement with a shiny, reflective finish that magnifies the color. Satin works nicely for trim, while glossy paint can modernize kitchens and bathrooms.
For the walls in living rooms, bedrooms, and home offices, neutral and medium-tone matte or eggshell paints are versatile and forgiving. In high-traffic areas like hallways, staircases, and kids' rooms, satin or glossy paint stands up well to scratches and stains. Consider durable enamel paint for trim, doors, and cabinets.
Don't forget the ceiling! Painting the ceiling a lighter shade of your wall color helps open up and brighten the space. An accent wall in a complementary shade or contrasting color provides visual depth and interest. Once you've narrowed down your options, buy sample pots to view the colors in your actual space. Colors change dramatically depending on lighting and surroundings.
When painting, use a high-quality angled brush for cutting in edges and a roller for large, open areas. Apply at least two coats of paint, waiting 2-4 hours between coats. Start at the top and work your way down using smooth, even strokes. For the best results, take your time a good paint job can last for many years and transform the look and feel of your home.
Hiring Professional Painters vs DIY Painting
When it comes to home renovations, painting is one of the easiest ways to transform a space. But should you hire professional painters or take on the project yourself? There are pros and cons to both options.
DIY Painting
Painting your own place has some benefits. You'll save money by not paying for labor. You can work at your own pace and on your own schedule. And for small projects, DIY painting is certainly doable if you're at least somewhat handy. However, for larger jobs or if you have limited experience, professional help is probably worthwhile.
Some downsides to DIY painting:
It can be time-consuming and tiring, especially for big rooms or multi-room projects.
You have to buy or rent equipment like rollers, brushes, trays, ladders, etc.
There's a learning curve to get good results. Uneven coats, drips, and brush marks are common mistakes.
Prep work like patching holes, cleaning walls, and taping trim is tedious and important to get right.
You're solely responsible if anything goes wrong or the end result isn't up to your standards.
Hiring Professional Painters
Bringing in the pros has significant advantages. They have the proper experience, tools, and skills to handle the entire project efficiently with quality results.
Professionals can complete the work much faster. They know all the necessary steps and best techniques.
They provide a warranty or guarantee in case you're not satisfied with the final product.
Liability insurance and workers comp coverage gives you peace of mind.
An experienced painter can offer advice on colors and finishes and address any issues that come up.
The main downside is the cost. Paying pros typically costs significantly more than a DIY job. Get at least three estimates to compare.
For the best results at a lower cost, you could do the prep work yourself and hire painters just for the actual painting. In the end, evaluate how much time and energy you want to put in versus your budget to determine if DIY or professional help is the better choice for your painting renovation.
Painting Techniques for a Flawless Finish
When tackling a painting renovation, using the proper techniques will ensure you get professional-looking results. The key is taking your time and paying attention to the details.
First, make sure the walls are properly prepped. Patch any holes or cracks, then sand rough areas. Wipe away dust with a tack cloth. Apply a primer if you're going from a dark color to a light color. Let the primer dry as directed.
Use painter's tape to protect trim, ceilings, and floors. Carefully tape off any outlets or switches as well. Remove tape as you go to avoid having to scrape dried paint off the tape.
Use a paintbrush to "cut in" around the edges and trim before rolling. Load the brush with paint and use short strokes, reloading as needed. An angled brush works well for corners.
For rolling, use a roller cover recommended for your paint type. Load the roller with paint and roll it over the wall using vertical strokes. Refill as needed, making sure not to overload the roller. Work sections across the wall.
Consider using an extension pole for high ceilings or hard-to-reach areas. Attach the roller to the pole and slowly roll across the surface, applying firm and even pressure. Have someone spot you from below to ensure even coverage.
Inspect your work and touch up as needed. Look for any drips, uneven coverage, or missed spots and fix them. For the best results, consider applying two coats of paint waiting for each coat to dry completely between applications.
With some patience and the proper technique, you'll achieve a smooth and professional finish. Take a step back and admire your handiwork - you've successfully transformed your space with a fresh coat of paint!
Caring for Your Freshly Painted Space
Now that you have a freshly painted space, it's important to care for it to keep it looking its best properly. Follow these tips to maintain your new paint job:
Ventilate and Dry
Keep windows open to ventilate and circulate the air in the room. This will help eliminate the paint smell and any volatile organic compounds (VOCs) released from the new paint. Run an exhaust fan to improve ventilation if possible.
Make sure the paint has dried completely before closing windows or using the space. Most latex paints dry to the touch within 1-2 hours but need at least 24-48 hours to cure before closing up a room. Oil-based paints require even longer.
Avoid excess moisture in the room for several days. Don't take long, steamy showers, do laundry or cook foods that produce grease or steam. Moisture can damage the new paint before it has fully cured.
Gently Clean
For the first week, only do light dusting and vacuuming in the space. Avoid harsh chemicals, abrasive cleaners, and rough scrubbing.
After 1-2 weeks, you can resume normal cleaning in the room using a soft rag or microfiber cloth and gentle, pH-neutral cleaners. Avoid scrubbing at scuffs or stains during this time.
For stuck-on messes, try a non-toxic product like diluted white vinegar, baking soda paste, or citrus solvent and gently blot until clean.
Touch Up As Needed
Examine the new paint for any drips, splatters or missed spots and touch up with a small artist's brush as needed. For larger flaws, you may need to do minor touch-ups with a roller.
Match the paint color precisely to avoid obvious patches. Save any leftover paint in case you need it for future touch-ups due to nicks, stains, or water damage.
By following these helpful hints, you'll keep your new paint looking fresh for years to come. Take it slow, be gentle, ventilate well, and touch up any imperfections. Your newly renovated space will stay picture-perfect.
Wrapping Up Your DIY Painting Adventure
You've got the basics down now, so it's time to get to work. Grab your paintbrush, roll up your sleeves, and get ready for a weekend of home improvement. By taking the time to prepare the space properly, choose colors you love, and apply 2-3 coats for the best coverage, you'll have a fresh new look in no time. Once the final coat is dry and you step back to admire your handiwork, you'll be glad you took on this project. Your newly painted room will make you smile every time you walk in, and you can proudly say you did it yourself. The transformation is complete! Enjoy your freshly painted space - you've earned it. Until next time, keep on making your house a home.
Frequently Asked Questions
How do I choose the right paint finish for different rooms in my home?
Choosing the right paint finish is crucial for both aesthetics and durability. For high-traffic areas or rooms exposed to moisture, like kitchens and bathrooms typical in Rhode Island homes, a semi-gloss or high-gloss finish is ideal due to its moisture resistance and ease of cleaning. Living rooms and bedrooms, on the other hand, benefit from an eggshell or satin finish, providing a subtle glow that enhances the natural light reminiscent of the coastal ambiance of Rhode Island. The finish not only complements the room's function but also accentuates its design.
Can paint colors affect the mood and atmosphere of my home?
Absolutely! Paint colors have a significant impact on a room's mood. For example, cool blues and greens, inspired by Rhode Island’s coastal landscapes, can create a serene and calming atmosphere, perfect for bedrooms or studies. Warmer tones, like yellows or soft oranges, can evoke cheerfulness and warmth, making them great choices for kitchens or living areas. When choosing colors, consider the emotional impact and how it aligns with the purpose of each room, infusing a bit of Rhode Island's tranquil yet vibrant essence into your space.
What are the best practices for ensuring a flawless paint job?
A flawless paint job starts with thorough preparation. Ensure the walls are clean, dry, and smooth. Repair any cracks or holes and sand down uneven surfaces. Using painter's tape for clean edges and applying a primer can enhance paint adhesion, which is especially important in the varied climates of Rhode Island. When painting, use long, even strokes and avoid overloading the brush or roller to prevent drips. Letting each coat dry thoroughly before applying the next is crucial for a smooth, even finish that captures the beauty and resilience of Rhode Island homes.
Are there specific color trends for painting in coastal areas like Rhode Island?
In coastal areas like Rhode Island, color trends often draw inspiration from the natural surroundings. Think of the soft blues, greens, and sandy neutrals that mimic the ocean, beaches, and coastal flora. These colors create a serene, open atmosphere, reflecting the state's natural beauty. Incorporating these colors into your home can bring a sense of calm and continuity with the environment, perfectly aligning with Rhode Island’s scenic landscapes and historic charm.
When should I consider hiring professional painters instead of DIY?
Consider hiring professional painters for large-scale projects, intricate work, or if you’re unsure about tackling the project yourself. Professionals bring expertise in surface preparation, color selection, and application techniques, ensuring a high-quality finish. This is particularly beneficial for historic Rhode Island homes, where preserving architectural integrity is key. While DIY can be satisfying, professional painters save time and guarantee a polished result, especially in complex spaces or when using advanced techniques that reflect the distinct character of Rhode Island homes.


HOURS
Mon - Fri: 8:00 am - 5:00 pm
Sat: Closed
Sun: Closed
Saturday and Sunday by Appointment Only

SERVING
Newport, RI
Middletown, RI
Portsmouth, RI
Jamestown, RI
Narragansett, RI
North Kingstown, RI
Tiverton, RI
Bristol, RI
and Surrounding Areas

Powered By Media Ace Marketing
HOURS
Mon - Fri: 8:00 am - 5:00 pm
Sat: Closed
Sun: Closed
Saturday and Sunday by Appointment Only
SERVING
Newport, RI
Middletown, RI
Portsmouth, RI
Jamestown, RI
Narragansett, RI
North Kingstown, RI
Tiverton, RI
Bristol, RI
and Surrounding Areas